Verily Workbench Guide
Verily Workbench is where CRN Cloud data actually gets analyzed. Once your data use agreement is approved, this is the shared compute environment that serves as the "Data Utilization: Analysis & Sharing" pillar of the CRN Cloud ecosystem.
Access required
Everything on this page assumes your CRN Cloud data access has already been approved. If you haven't done that yet, start with Requesting Data Access.
Accessing Verily Workbench
- Navigate to the Verily Workbench login page.
- Sign in using your institutional or approved credentials associated with ASAP CRN access.
- Once logged in, you will land on the Workbench dashboard.
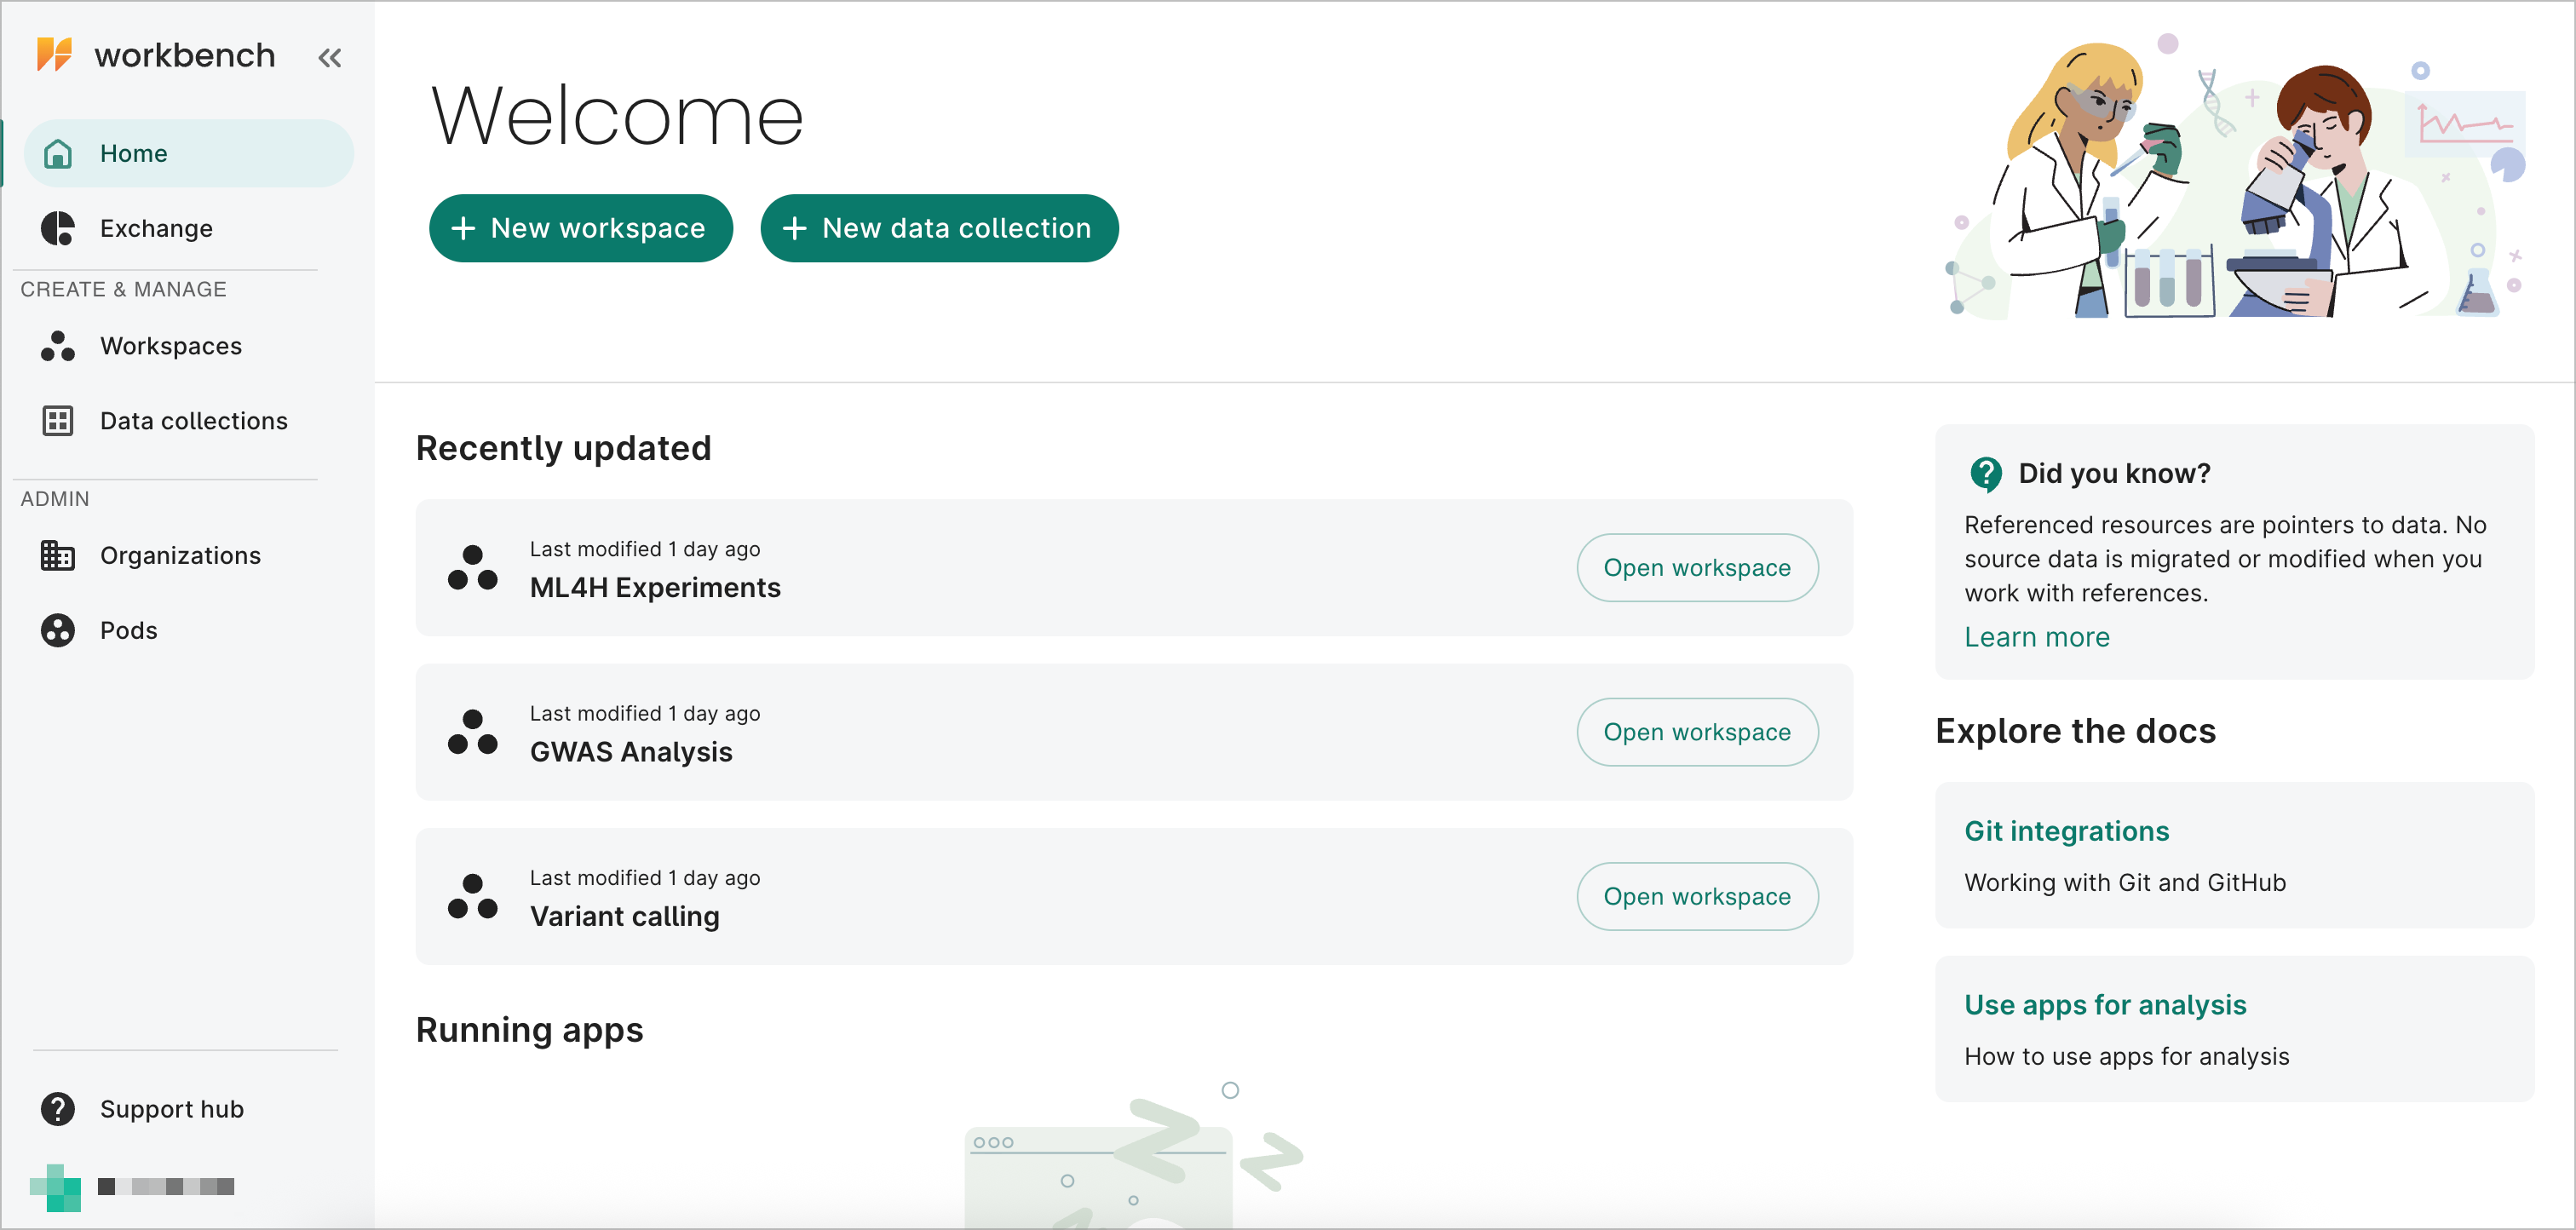
Accessing the reference workspace
Workspaces in Verily Workbench are collaborative environments where you can manage data, launch apps, and run notebooks. Each workspace serves as a container for your analyses, storing your data, compute environment, and version-controlled code together for easy collaboration and reproducibility.
A "Start Here" reference workspace is already set up in Verily Workbench to help you get started, serving as the landing page to our most up-to-date workspaces based on CRN Cloud releases. Each workspace is connected to the CRN Cloud data so you don't have to configure that yourself.
🔗 ASAP CRN "Start Here" Reference Workspace
Establishing a spend profile
Your personal workspace needs a spend profile or billing pos attached before you can duplicate or create your workspace.
- General CRN members and non-CRN members: email workbench-support@verily.com to have a spend profile established.
- Provisioned CRN member spend pod: if you've been notified that you're part of this group, check the Workspace details panel on the right-hand side of your personal workspace and confirm you're assigned to the
asap-crn-gcppod.
Pod required
You must belong to at least one billing pod in order to perform operations that incur costs, such as creating workspaces or running cloud apps. If you are unsure whether you have pod membership, contact your project administrator or Verily support before proceeding.
Establishing your personal workspace
- From the "Start Here" Reference Workspace, select and open the desired workspace.
-
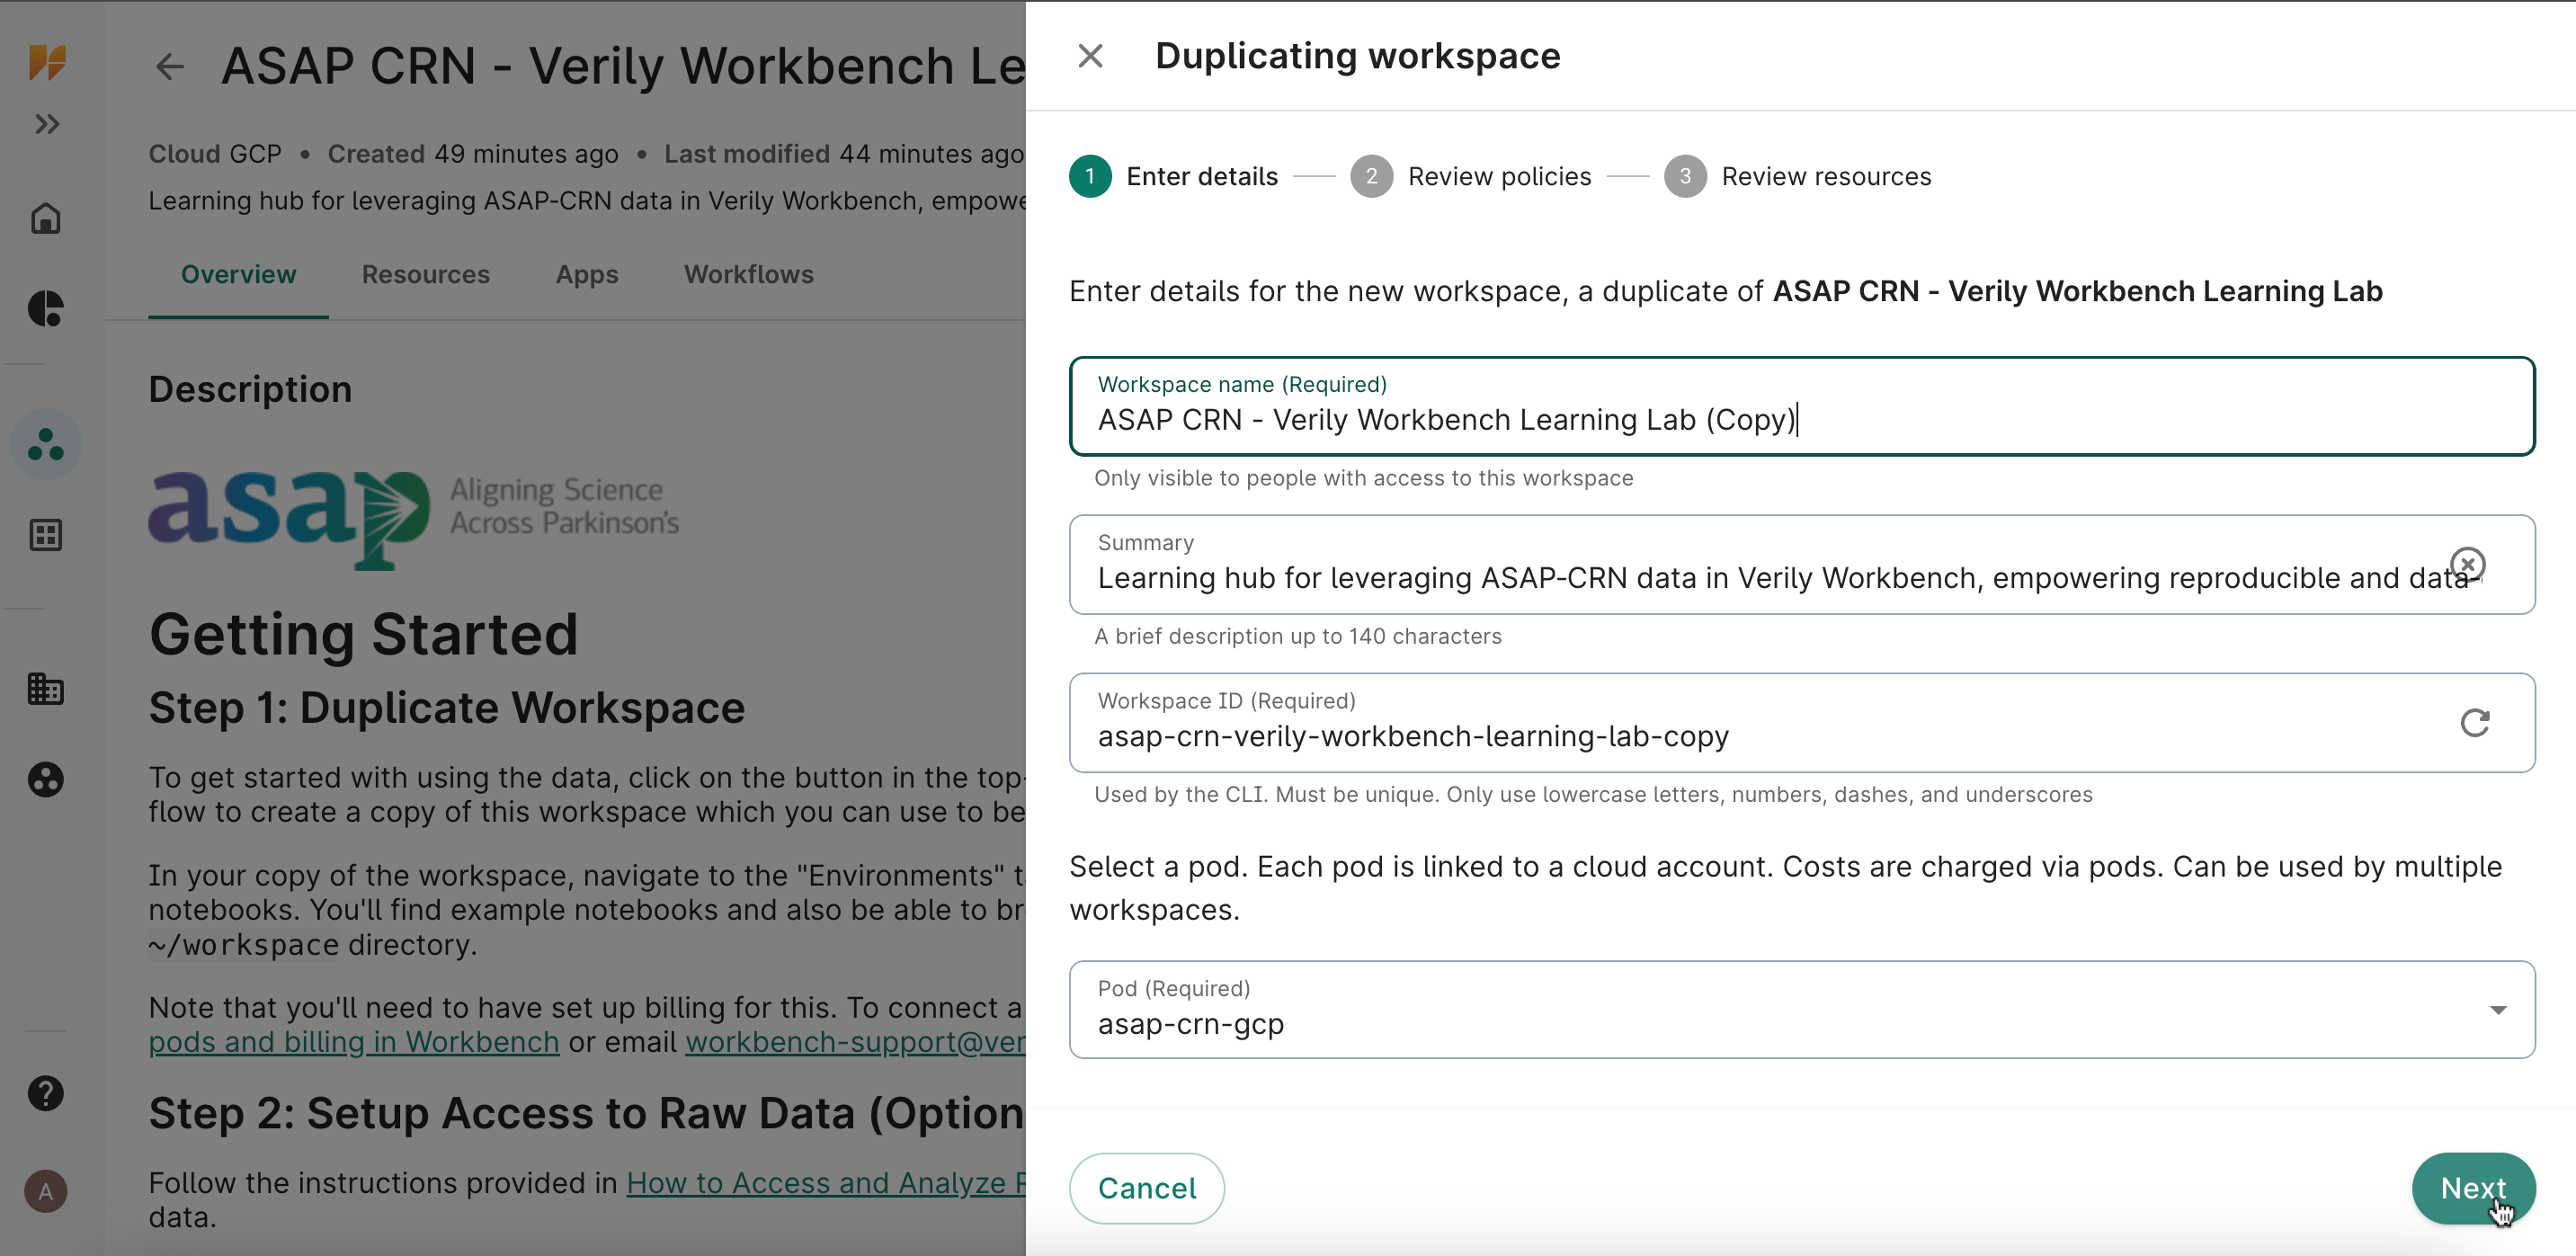
Select the three dots (⋮) on the upper-right of workspace page and select Duplicate.

-
Complete the duplication dialog screens
-
Click Duplicate on the final dialog screen. Allow 2 minutes for the system to duplicate the workspace and all associated resources. Your duplicated workspace will appear under the Workspaces tab in the left navigation panel.
Tip
Your duplicated workspace is fully independent. You can install packages, upload small test datasets, or modify notebooks without affecting the shared Learning Lab version.
What's next
| If you're trying to... | Go to |
|---|---|
| Find and load curated or raw data into your workspace | Resources |
| Connect a pipeline repo to your workspace | Connecting GitHub Repos |
| Launch a Jupyter or RStudio Notebook and run an analysis | Apps |